
Python#
Python is a popular computer programming language. It is widely used in many different fields, scientific research, IT companies, financial institutions, \(\cdots\) . The use of python is required in this short course. I hope that readers have a little bit of experience in coding with python. If you haven’t use it yet, you need to learn it a long with this course. There are many online tutorials for self-studying. Some of popular ones are listed at
sunscrapers.com. You can pick one that matches to your level. The following book will be useful in general.
Allen B. Downey: Think Python - How to think like a computer scientist (O’Reilly Media, 2016) or (Green Tea Press, 2012)
which is freely available at greenteapress.com. If you prefer a hard copy, You can buy a paperback at amazon.com.
You must be able to execute python codes on a computer. A computer provided by your school may have python on it. You can also use online services such as Google Colab where you can run python codes for free. However, school computers or online services often do not have modules you need. It is highly recommended to have python on your own computer. It is completely free but takes up some disk space (at least 5Gb). In addition to basic installation, you need to install additional modules for quantum computing. In this chapter, I explain how to install standard python. An additional modules, jupyter will be introduced in the following sections.
Installation [1]#
There are many ways to install python. One problem is that basic python (we shall call it python platform) is not enough to do almost anything. For example, the python platform does not provide any scientific function. We need to install many modules along with the python platform. Fortunately, most of modules we need are managed by a package manager called conda. Unless you are expert of python, I strongly recommend to use conda.
Downloading anaconda package
Go to anaconda.com and download the installer for your OS . Linux, Microsoft Windows, and Mac OS are all supported.Run the installer
Execute the installer. If the installer asks if it is for single user or multiple users, chose single user. It also asks a location to install. The default location is fine.Launching anaconda
The way to launch anaconda depends on the OS.
Linux
Anaconda configuration is written in.bashrc. When you open a new terminal, anaconda is ready.Windows
Open the Start Menu and pull down Anaconda3 menu. Click “Anaconda Prompt” or “Anaconda Powershell Prompt”, whichever you like. Anaconda works only inside the Anaconda terminal window. You see another link in the menu: Anaconda Navigator. You can launch major applications from the navigator including JupyterLab. Since it must configure environment for each applications, the navigate starts slowly.Mac OS
To be written.
Updating the package
There may be newer version of packages. To update installed packages, run the following command inside the terminal window:
conda update -all
Now the basic installation is completed. If you are interested in what packages are installed, use the following command.
conda list
You will see hundreds of packages. We will be using many of them even without knowing it.
Using Python#
You can use python interactively inside the text window. Just use command python.
python
Python 3.9.12 (main, Apr  4 2022, 05:22:27) [MSC v.1916 64 bit (AMD64)] :: Anaconda, Inc. on win32
Type "help", "copyright", "credits" or "license" for more information.
>>>
“>>>” is python prompt. You enter a single line code here. For example
>>> 1+2
3
>>>
To exit from the python interactive mode, use the following exit function:
>>> exit()
We rarely use the interactive mode. Instead, we write a source code using a text editor and run it. There are also so-called integrated development environment (IDE). spyder and jupyter are the two most popular IDEs for python. We usejupyter-lab to develop python codes. Actually, this textbook is entirely written with jupyter-lab.
Numpy#
Unlike other computer languages such as C++, Python platform is not capable of mathematical calculation. Mathematical modules are provided by various packages. Among them, Numpy is commonly used. Free documentation and tutorial are available at numpy.org.
To use it, we must import the module to your code. In this book, we import it as
import numpy as np
where np is a shorthand of numpy. You can access methods (functions) and attributes associated with the numpy class using the shorthand. For example, we calculate \(\cos(\pi)\) as
import numpy as np

np.cos(np.pi)
np.float64(-1.0)
Notice np. attached to cos() and pi. We must tell python platform that the mathematical expressions are defined in numpy.
Running python codes on your computer
You can copy the python code to the clipboard on your computer. Move the cursor to the top-right corner of the code block. Copy icon shows up. Just click it. The content of the code block is copied. You can paste it to your jupyter-lab (or a python source file) and run it.
Running python codes at Google Colab
Launch Google Colab from the launch button at the top of the page. This page is automatically transferred to Colab. Sign in to Colab if you haven’t yet. Now, you can run the python code by clicking a little triangle button at the upper-left corner of the code block. You can modify the code and run your own version.
Exercise 0.1 Calculate \(\sin\left(\frac{\pi}{2}\right)\) using python.
Matplotlib#
When we want to show results of computation as graphs, we use a plotting module matplotlib. It is a powerful visualization package for scientific research. Free documentation and tutorials are available at
matplotlib.org.
In this book we import it as
import matplotlib.pyplot as plt
where plt is a shorthand.
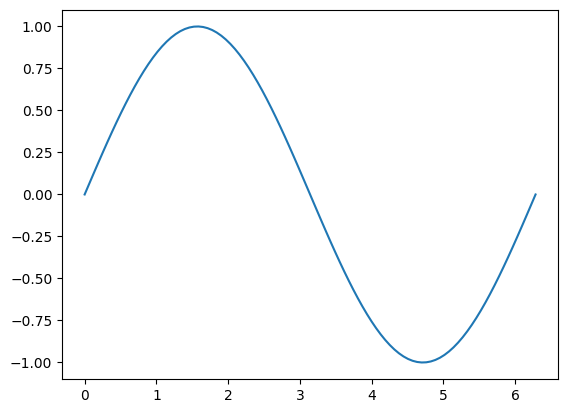
The following example plots \(\sin(x)\) for \(x \in [0,2\pi]\)
import matplotlib.pyplot as plt   # visualization tools
import numpy as np  # numerical math package
x=np.linspace(0,2*np.pi,100)  # generates 100 points betwee 0 and 2pi
plt.plot(x,np.sin(x))
[<matplotlib.lines.Line2D at 0x7fd15cd656d0>]
Exercise 0.2 Calculate \(\cos(x)\) for \(x \in [-\pi,+\pi]\) using python.
Lat modified on June 4, 2022.